Wednesday, March 24, 2010

Granny-on-the-loom

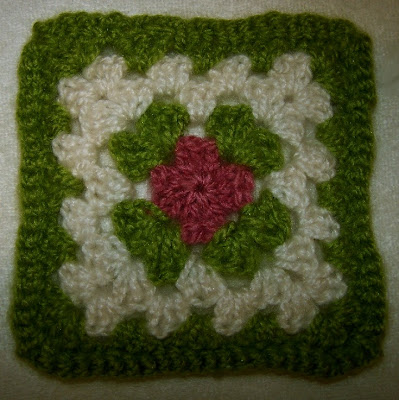
Last June, I started exploring translating concentric crochet techniques on the knitting looms which resulted in several different coaster designs. The first attempt was Patriotic Coasters, followed by Watermelon Coasters, Sunflower Coasters, August Sun Coaster and finally Hexagonal Granny. All of these designs just mimicked crochet stitches, but each one took me a little closer to what I was trying to achieve - to translate actual crochet stitches on the knitting looms. At the time I had so many things going on that I didn't have time to just sit down and physically experiment with the looms, so I did a lot of mental knitting. It's a wonder that I didn't have a wreck, because I knitted in my mind while driving, in doctor's waiting rooms, in lines, at government buildings, on long weekend drives and laying in the bed at night. All this resulted in the Granny's Rose square and a new technique I fondly call "loomchet" was born.

When I first completed the Granny's Rose, which produced actual crochet stitches on the knitting looms, I had hoped the tutorial would be ready by last September. However, I'm a champion procrastinator and extremely absent-minded which is a recipe for disaster. It would probably be lost and forgotten had it not been for Kelly Jones from Kelly Knits, who stayed after me to complete the tutorial for the loomed granny squares. She also test knitted and proofread the tutorial for me. This is Kelly's granny square scarf she made for her husband's grandmother. (BTW - The loomed granny square scarf was Kelly's first experience with crochet of any kind.)
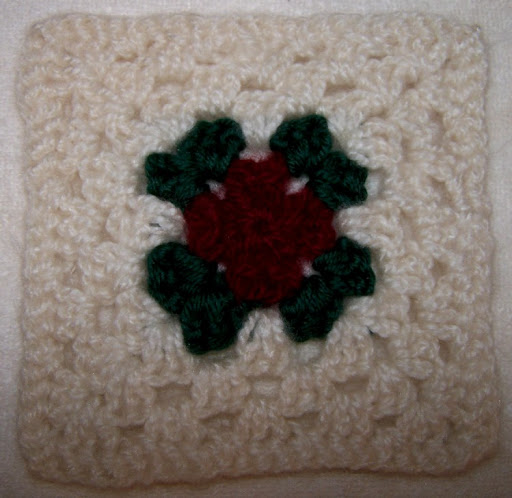
The Granny-on-the-Loom Tutorial is listed under Loom Knitting Techniques in the right sidebar. As stated in the tutorial:

This tutorial will show you how to make a simple granny square by incorporating two pegs on the Knifty Knitter Looms to produce crochet stitches. This technique is presented to you as an alternative way of crocheting for those who either never learned how to crochet or for those who experience pain when crocheting using conventional methods. It is also a handy technique for quick embellishments when loom knitting. Word of warning, like any new technique, the two peg stitch technique is a bit fiddly, but the results are well worth the effort.
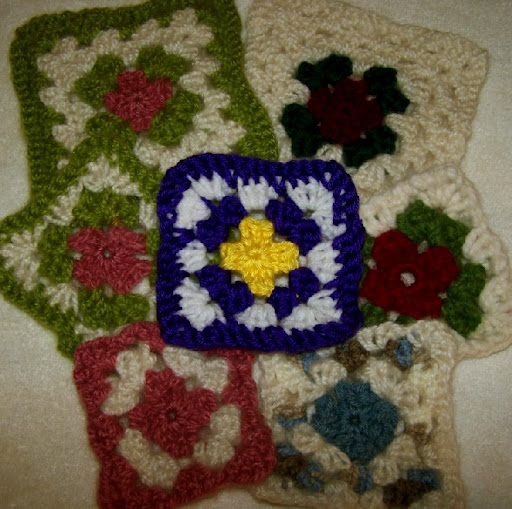
For best results, gather your supplies and find a quiet spot, then work through it as you read the tutorial. It is not a difficult technique, but it does require a hands on approach. Hopefully, there will be a video demo before too long. In the meantime, be good to your granny!

Monday, March 15, 2010

Shamrocks

Due to a number of requests on one of the loom knitting groups, I am posting this Shamrock Pattern. These shamrocks are made using one strand of worsted weight yarn on the 5 peg Knifty Knitter Spool Loom - love that spool loom! Make three little six row leaves and a two inch i-cord stem. Then stitch them all together and in less than 30 minutes you have a cute little two & one-half inch shamrock. I've seriously been toying with the idea of embroidering a face on the top middle leaf to create a little amigurumi shamrock. If I do, I'll update this post with a picture at the end.

This particular design has gone through several versions. One version was modified from the
Double Heart pattern by Althea Burger and recently taught in Loom Class. Three hearts were made using green yarn following the Double Heart pattern and an i-cord stem was added. This makes a beautiful, but rather large shamrock. Here's Althea's shamrock:

An earlier version I designed was an I-cord clover. This one is also made on the 5 peg Knifty Knitter Spool Loom. It is made from the center out using a little two row loomer's magic circle (LMC) and 6 stitch i-cords worked into the bind off to form the leaves & stem. These work up quickly, since no stitching is involved; however, they just aren't as pretty as the shamrocks.

Please comment if you enjoy this project. Feedback from readers helps me determine if I should continue to write these patterns. I'll leave you with these Irish blessings for St. Patrick's Day:

For each petal on the shamrock
This brings a wish your way,
Good health, good luck, & happiness
For today and every day.

May your blessings outnumber the shamrocks that grow
And may trouble avoid you wherever you go.

Wednesday, March 10, 2010

Itsy eggs & bitsy bunnies

As promised in the previous post, I now present the Itsy Eggs & Bitsy Bunnies. If you made a Jellybean Basket, you might be interested in a few of these tiny little no-calorie knit treats to go into your little basket. These were designed just for the small basket, because I didn't have the usual candy decorations on hand when I made pictures of the revised Jellybean Basket. The little eggs are one inch tall and the bunnies are three inches tall. Both are quick & easy to make on the five peg end of the Knifty Knitter Spool Loom.

Contrary to what you might think, the little eggs required more trial & error knitting than many of the projects I've done. I had to crack quite a few eggs before I got it right. It is important that you knit one peg at a time to keep an even tension when knitting both projects, but especially the little eggs. Just so you know things don't always come out right the first time, here's a picture of "the good, the bad & the ugly" little eggs.

Trial & Error Egg Knitting: The Good, The Bad & The Ugly

The patterns have been test knitted and added to the Pattern Box on the right, or they can be accessed by clicking on Itsy Easter Eggs or Bitsy Bunnies.

Thursday, March 04, 2010

Jellybean basket redux

Remember the original Jellybean Basket? It was one of my earlier patterns that I designed three years ago. I had only been loom knitting for five months - just a "newbie loomer" wanting to do things that weren't suppose to be done on looms. Many have wanted to do this pattern, but found it difficult or confusing, which was most probably due to pattern errors and questionable techniques that I used when designing the little basket. Some worked around the impossibly tight stitches & faulty techniques; a few others used it as a springboard to design their own basket; and some just gave up. Too many people have had too many problems and I knew I needed to do something about it, but never seemed to find the right time.

Now three years later I still try to do things that aren't suppose to be done on the looms, but I've learned quite a few tricks since the original Jellybean Basket was created. So, when a nice lady named Monica, who wanted to make the baskets for her Sunday school class, contacted me recently with pattern questions, it was then that I decided to give the Jellybean Basket a complete overhaul. Thank you, Monica for being my impetus and test knitting the updated basket.

The new design is similar to the old one, but different techniques and stitches are used to accomplish what I was trying to do in the original basket: scalloped base & rim with a slight taper from the top to the bottom. The cup liner on the updated basket is a 3 ounce bathroom drinking cup, which fits perfectly without cutting the cup as you had to do in the original design. However, the double e-wrap knit stitches that are used on the basket sides are so dense that you may find the liner is not necessary. You also have two design options: the regular basket or the basket with the ribbon. The later has an additional e-wrap row to allow ease in weaving the ribbon through the stitches.

When I was making the pictures of the new baskets, I only had a few jellybeans on hand and didn't have any bunny Peeps to add to the basket for decoration, so I created some tiny little bunnies and eggs. Both are made on the five peg end of the Knifty Knitter Spool Loom. I'll talk more about those in the next blog post, so stay tuned.