Showing posts with label sunflower. Show all posts

Wednesday, April 24, 2013

Sunflower coasters

Popping in to share a fun quick project in honor of Earth Day (April 22, 2013) and International Sunflower Guerrilla Gardening Day (May 1). Sunflowers have much symbolism worldwide and in Native American culture as the "fourth sister" to the better known three sisters combination of corn, beans, and squash when gardening. It has also played an important part in American history and became the state flower of Kansas.

So, what better way to say "green" than to knit up a stack of sunflower coasters? These are such a fun and quick project to do, once you've mastered the cast on/bind off technique for the petals. Not only are they great for coasters, but these large six inch diameter sunflowers can be incorporated into hats, handbags, scarves, afghans, kitchen accessories and home decor. 


Saturday, August 01, 2009

Sunflower trio

I love sunflowers! One of my first loom knitted flower projects was a sunflower. Since I've been on a coaster kick, I thought I would update the original sunflowers into coasters. Actually, these could be used not only as coasters, but also for decorative trim on other items as well. I intended to post these pictures a couple of weeks ago, but I just haven't found the time to blog lately. I've already moved on to several other projects, but I wanted to share my sunflowers with you. The center of these were made using the same technique I used for the first four rounds of the Watermelon Coasters. After that, I experimented with several different I-cord edgings for the yellow petals. The edging in all these were knitted directly on the edge of the brown center using two pegs on the Knifty Knitter Flower Loom; however, any large gauge loom could be used. Caron Simply Soft in yellow and brown were used on these three flowers.

Single edging
This is the first sunflower coaster with the simple single edging:

The first petal was created by using two strands of yellow yarn as one and attaching it to one of the back loops on the brown edge to create the first loop. I then picked up the back loop of the next brown stitch and attached it to the adjacent peg to create the second loop. Using these two loops, I worked a five stitch I-cord and ended the petal by wrapping the second peg, knit off, lift and place the this loop on the first peg and knit off. To complete this petal and start the second one, count the next three free stitches from the I-cord stitch, lift the back loop of the third stitch and place it on peg next to I-cord bind off stitch. Repeat the five stitch I-cord sequence for the next petal. If you counted correctly, you should end up with twelve yellow petals.

Ruffled edging
The second flower has an extra full ruffled edging:

Again I started with the first four rounds as used with the Watermelon Coasters. This will give you thirty-six chain stitches along the brown outer edge of the center. The petals were a variation of the previous sunflower, but much fuller. This was accomplished by using a three stitch I-cord, which makes a dense petal and attaching the petals on every second free stitch. If counted correctly you should end up with twenty-four petals - I have twenty-five and refused to frog it.

Double edging
This flower started the same way as the others, but has a double I-cord edging:

I started this flower by recreating the single edge flower as described above. The second I-cord edging was created exactly the same as for the single edging, but instead of a five stitch I-cord I did a seven stitch I-cord before the bind off stitch.

I've really been enjoying the two-peg knitting technique. As soon as I get a chance, I'll show you a variation of this technique as applied to the brim of my Autumn Skullcap. I just know that you're gonna love it!

Sunday, March 11, 2007

Looms in bloom: loom knitting flowers

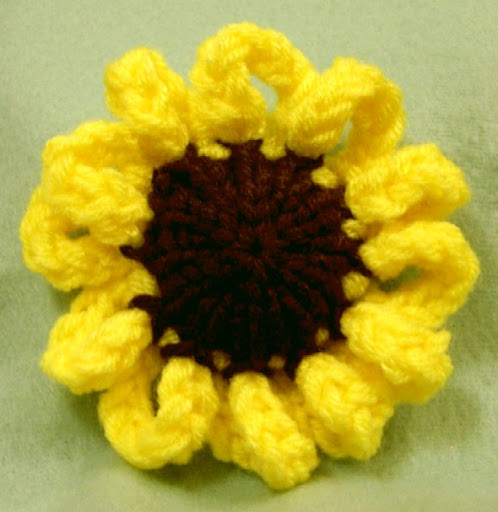
My desire to knit a flower has been germinating every since I first picked up the Knifty Knitter flower loom and last night the idea came into full bloom. When I went to bed and couldn't sleep, I tried counting sheep, but it only made me think of yarn. The next thing I knew I was playing with my flower loom. I had been toying with the idea of using the drawstring cast on to create the center of a flower after using it with the Easter egg pattern. Then when I used the I-cord stitch for the scalloped rim on the jellybean basket, I decided it looked a lot like flower petals, so I set to work to test my theory. The large sunflower above was the results of my runaway imagination. After completing the sunflower, I went to sleep dreaming of other possibilities and more flowers.

Today ended up being "car trip" day, which means time to loom knit. I tested various looms and changed the number of rows each time. The picture below shows the flowers I made during the car trip pictured with it's corresponding loom, along with the "bedtime" sunflower. The daisy & black-eyed Susan were made with the spool loom: the daisy on the eight peg end and the black-eyed Susan on the five peg end. The large daisy and the sunflower were made on the twelve peg flower loom.
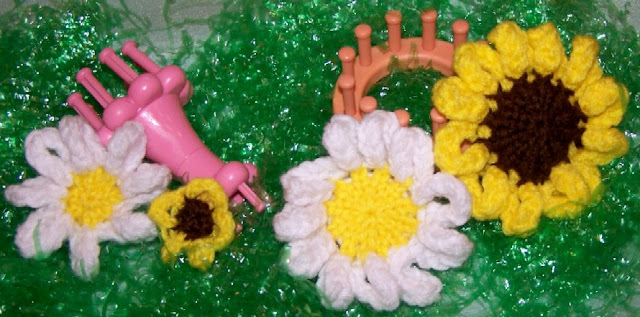
I do not recommend the spool loom for your first flower. It's very cumbersome to work with, especially on the five peg end where the inside loom opening is very narrow. The twelve peg flower loom produced the best flowers, but they are also quite large having a four & one-half inch diameter.

How to grow sunflowers on the flower loom
Unfortunately, I'm pressed for time right now and will not be able to write a detailed pattern until I return from vacation at the end of the month. However, you will find the flowers quite easy to make if you are familiar with my drawstring cast on method (see the Easter egg pattern) and the scalloped I-cord stitch trim I used in the little jellybean basket. Do a drawstring cast on using the twelve peg flower loom and two strands of Red Heart worsted weight yarn in brown or your chosen color. Flat knit Rows 1-4 and on Row 5 do e-wrap knit stitches. Cinch the center opening shut by pulling on the initial yarn tail from the drawstring cast on. Pull the yarn tail to the inside and tie off. Change yarn colors to two strands of bright yellow. Row 6 consists of a nine stitch I-cord pattern. On Row 7, lift the ladders from Row 5 to do a hang-hem, then knit the bottom loops over the hang-hem loops. Row 8 is an e-wrap knit stitch row and Row 9 is the flat panel bind off row. End by tying off, securing and trimming all yarn tails.

Experiment on your own using various yarns and modified stitches. Be sure and share pictures of your accomplishments so we can all learn from them. The possibilities are endless.